


Disc golf enthusiasts understand the importance of regular practice to improve their skills. What if you could transform your backyard into the ultimate disc golf practice haven? In this article, we’ll explore the benefits of having a disc holder in your backyard and guide you through the process of installing it on your outdoor wall. Get ready to elevate your disc golf game with the perfect practice setup!
Benefits of Having a Disc Holder in Your Backyard
Convenience
Having a disc holder in your backyard provides easy access to your discs, allowing you to practice at your convenience without the hassle of heading to a park or course.
Organization
A well-designed disc holder keeps your discs neatly organized, making it easy to grab the right one for each shot.
Visual Appeal
Showcase your disc collection in a visually appealing manner, adding a touch of personality to your outdoor space.
Quick Retrieval
Eliminate the time spent searching for discs by having them within arm’s reach, making your practice sessions more efficient.

Choosing the Right Wall for Your Disc Holder
Before diving into the installation process, consider the following factors:
- Visibility
Choose a wall that provides a clear line of sight for your practice area, ensuring you can easily see and reach your discs. - Durability
Select a sturdy and flat surface that can support the weight of the disc holder and withstand the elements. -
Accessibility
Opt for a location that is easily accessible, allowing you to quickly retrieve and return discs during your practice sessions.
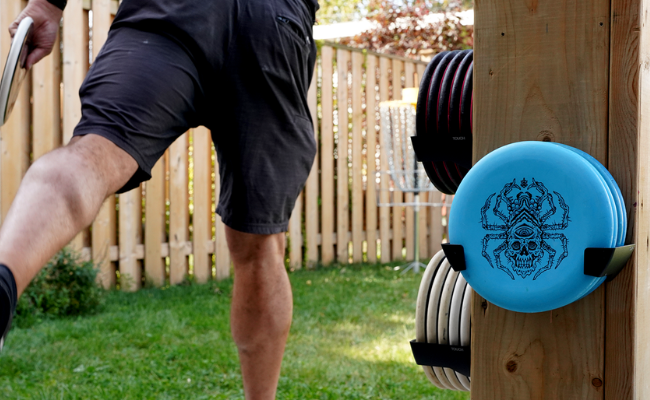
Installing the Disc Holder
TOUCH Disc Golf’s Disc Display Installation Step-by-Step Guide
Step 1: Find The Location On Your Wall
Start by identifying the optimal location on your wall for mounting the disc holder. Consider factors like visibility, accessibility, and the overall layout of your practice area. Mounting the holder close to your practice location is key.
Step 2: Level The Disc Display & Mark The Mounting Holes With A Pencil
Using a level, ensure that the disc holder is straight. Mark the mounting holes with a pencil, ensuring precision in your placement.
Step 3: Drill Your Two Pilot Holes
Carefully drill two pilot holes into the marked locations. Be mindful of the wall type and use an appropriate drill bit for the best results.
Step 4: Put Wall Plugs Into Drilled Pilot Holes & Tap In Flush With Your Hammer
Insert wall plugs into the drilled pilot holes, tapping them in flush with a hammer. This provides a secure anchor for the mounting screws.
Step 5: Fasten the Disc Display To The Wall Using The Mounting Screws
Align the disc holder with the wall plugs and fasten it securely using the provided mounting screws. Double-check for levelness and stability.